Denial of Pleasure: Attacking Unusual BLE Targets with a Flipper Zero
Authors: Matteo Mandolini & Luca Bongiorni
You might have heard about the recent "Apple BLE pair spoofing attack" which, thanks to an application developed for Flipper Zero, allows anyone to send pairing signals to iOS devices, creating annoying notifications. This method utilizes advertisement packets from various iOS pairing-capable devices, which, when broadcasted, are received by all listening devices within a range of about 5 meters.
In this blog post, I will revisit the same methodology, but this time attacking...unusual targets. This is an opportunity to review how broadcasting works in BLE and to become familiar with developing applications for Flipper Zero, in this case, leveraging the Bluetooth APIs.
At the end of the article we will be able to build a Flipper Zero app which will be capable of activating adult toys all at once or, depending on your mood, completely inhibit their use for those within your range.
Note: The code shown in this blog post is heavily based on the one originally developed by WillyJL, the credits for the Apple BLE pair spoofing attack app go to him.
BLE broadcast: a short introduction
In the BLE stack, the link layer is responsible for advertising, scanning, and establishing/maintaining connections, it is the layer that directly interfaces with the underlying Physical Layer. A single packet format for both advertising channel packets and data channel packets is used in the Link Layer. Advertising channel PDUs have two main purposes:
- Broadcasting data for applications that don't need a complete connection.
- Identifying and connecting with Slaves.
For broadcast connections the roles are called Broadcaster (in our case the mobile app) and Observer (the target device). The messages are one-way, the Broadcaster will never know if its packets will be received by the Observer, while the Observer will never know if it will ever see a packet from the Broadcaster.
Please enjoy my amazing drawing representing an ADV_IND Packet format in the image below:
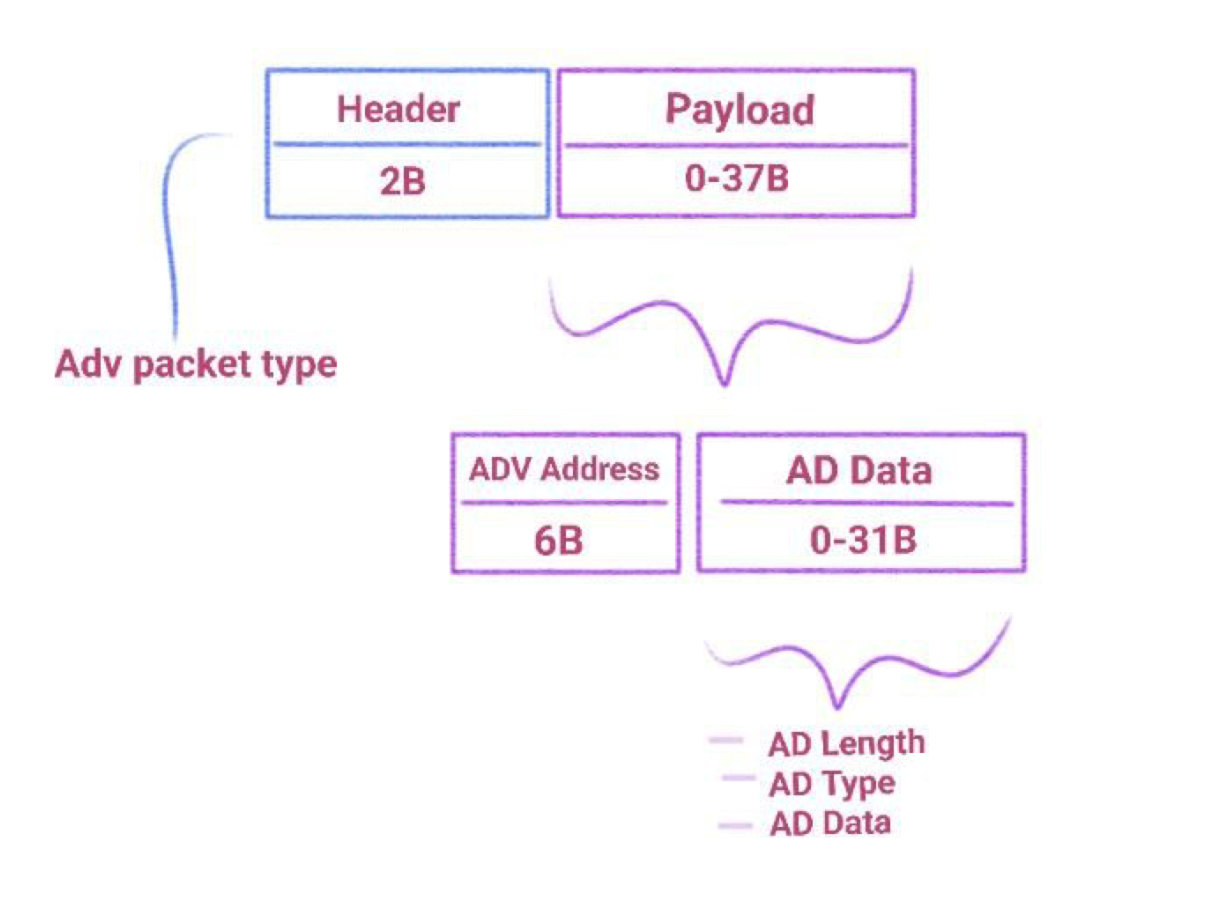
The AD data contains flags, UUIDS, the name of the Broadcaster and other things we will mostly ignore creating the packet we need for our porpouses.
Retrieving the magic packet
We have already anticipated that our targets are adult toys, specifically those managed by the Love Spouse app. The way the app works is simple: it allows us to log in as guests, select a device and make it vibrate with a click of a button.
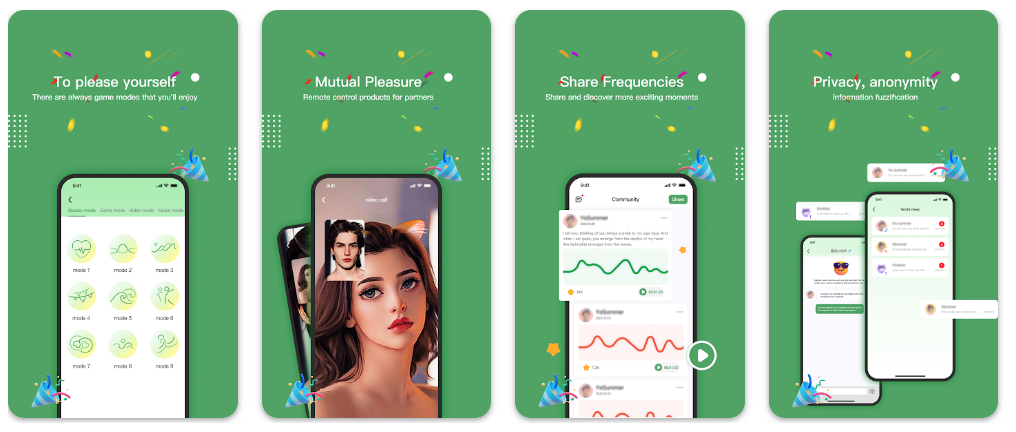
So, the first thing we want to do is to intercept the command that makes the toy vibrate and the one that makes it stop (in the app you just need to click the button two times). There are many ways to succeed: the first path I followed was to decompile the app and use Frida to intercept the function that sends the packets. The second method I used is nRF52840 + Wireshark to sniff the generated traffic.
We'll skip the explanation of the first two methods because, actually, the way I've found to be faster, more convenient, and reliable in this case is using the Android and iOS application called nRF Connect. This app allows us to intercept the broadcast packets we're interested in and study their contents.
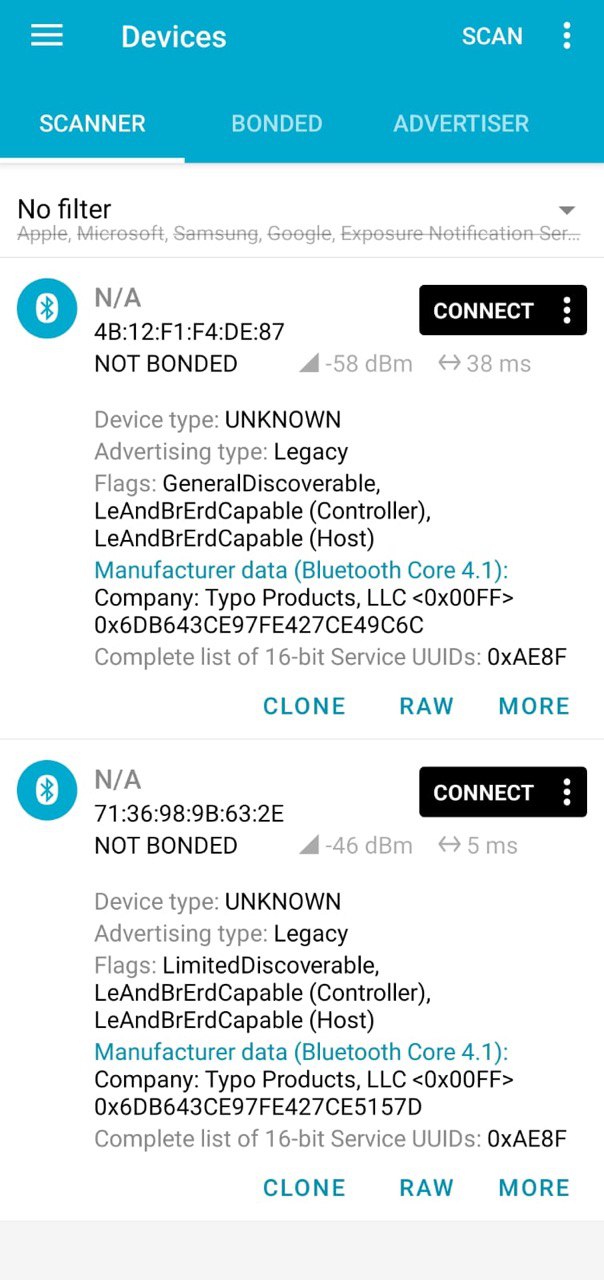
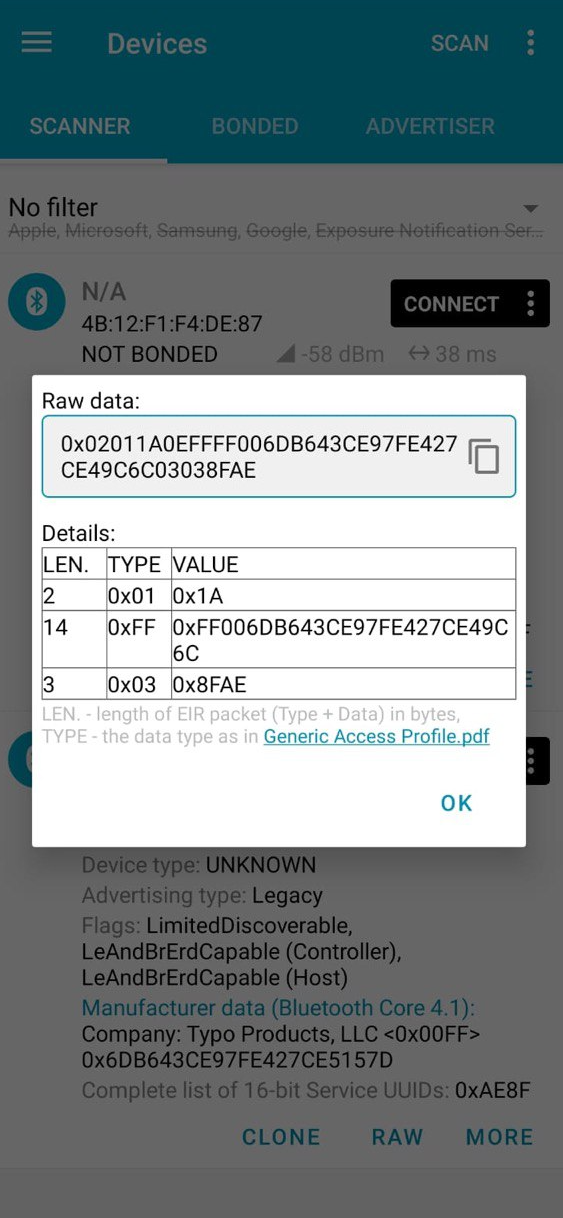
The images above show the two intercepted start and stop packets and their raw representation, respectively from left to right. By playing around with the Love Spouse application, we can easily see that there is a startup packet for each expected vibration command and a single stop packet. There is no differentiation even between models. With this information, we are ready to develop an app for Flipper Zero that replicates the behavior of the app regarding startup and can create a Denial of Pleasure by continuously broadcasting the stop packet.
Building the app
First step: Customize the BLE API
For this project, you could use any firmware you like. We will modify the firmware so that it is easy for us to customize the advertisement packets we want to send.
In Bluetooth Low Energy (BLE), "GAP" stands for "Generic Access Profile", it defines the roles and procedures for devices to establish connections, advertise their presence, discover nearby devices, and manage the connection parameters. For this reason, the changes we will need to make to the firmware will be primarily focused on the gap.c file.
The first modification we will make is the addition of an "if" statement in the function gap_advertise_start(GapState new_state). This "if" statement will be responsible for checking whether we want to use our custom data. In that case, it will update the data and packet length using aci_gap_update_adv_data, and it will also set the values of aci_gap_set_discoverable that we are not interested in, such as name, UUID, etc., to NULL or 0.
if(gap->custom_adv_data) {
status = aci_gap_set_discoverable(
ADV_IND, min_interval, max_interval, CFG_IDENTITY_ADDRESS, 0, 0, NULL, 0, NULL, 0, 0);
status = aci_gap_update_adv_data(gap->custom_adv_len, gap->custom_adv_data);
}
And, of course, we will add the implementation of gap_set_custom_adv_data, which will simply define the data and packet length in gap. This function will be called from furi_hal_bt.c, which is responsible for controlling the flow of the firmware's Bluetooth APIs. In fact, from the official firmware repository, we can read: FURI (Flipper Universal Registry Implementation). It helps control the applications flow, make dynamic linking and interaction between applications.
void gap_set_custom_adv_data(size_t adv_len, const uint8_t* adv_data) {
gap->custom_adv_len = adv_len;
gap->custom_adv_data = adv_data;
}
To keep things as simple as possible, the function we will add in furi_hal_bt.c will be responsible for both calling gap_set_custom_adv_data and initiating the broadcast.
void furi_hal_bt_set_custom_adv_data(const uint8_t* adv_data, size_t adv_len) {
gap_set_custom_adv_data(adv_len, adv_data);
furi_hal_bt_stop_advertising();
furi_hal_bt_start_advertising();
}
You can find all the other small modifications from the first API adjustments by WillyJL here
Second step: Build the app (.fap)
I will not go into the details of the steps required to build an app for Flipper Zero because there are dedicated comprehensive guides available, such as this one or this one.
However, the essential steps include creating the application structure:
- app.c
- application.fam
- icons
and building it using the command ./fbt fap_{APPID}. app.c is the file containing the main code, while application.fam is a sort of manifest describing the app metadata. One the application is built, we can find de .fap binary in the dist folder. In my case this is the result once I uploaded it to my Flipper Zero:
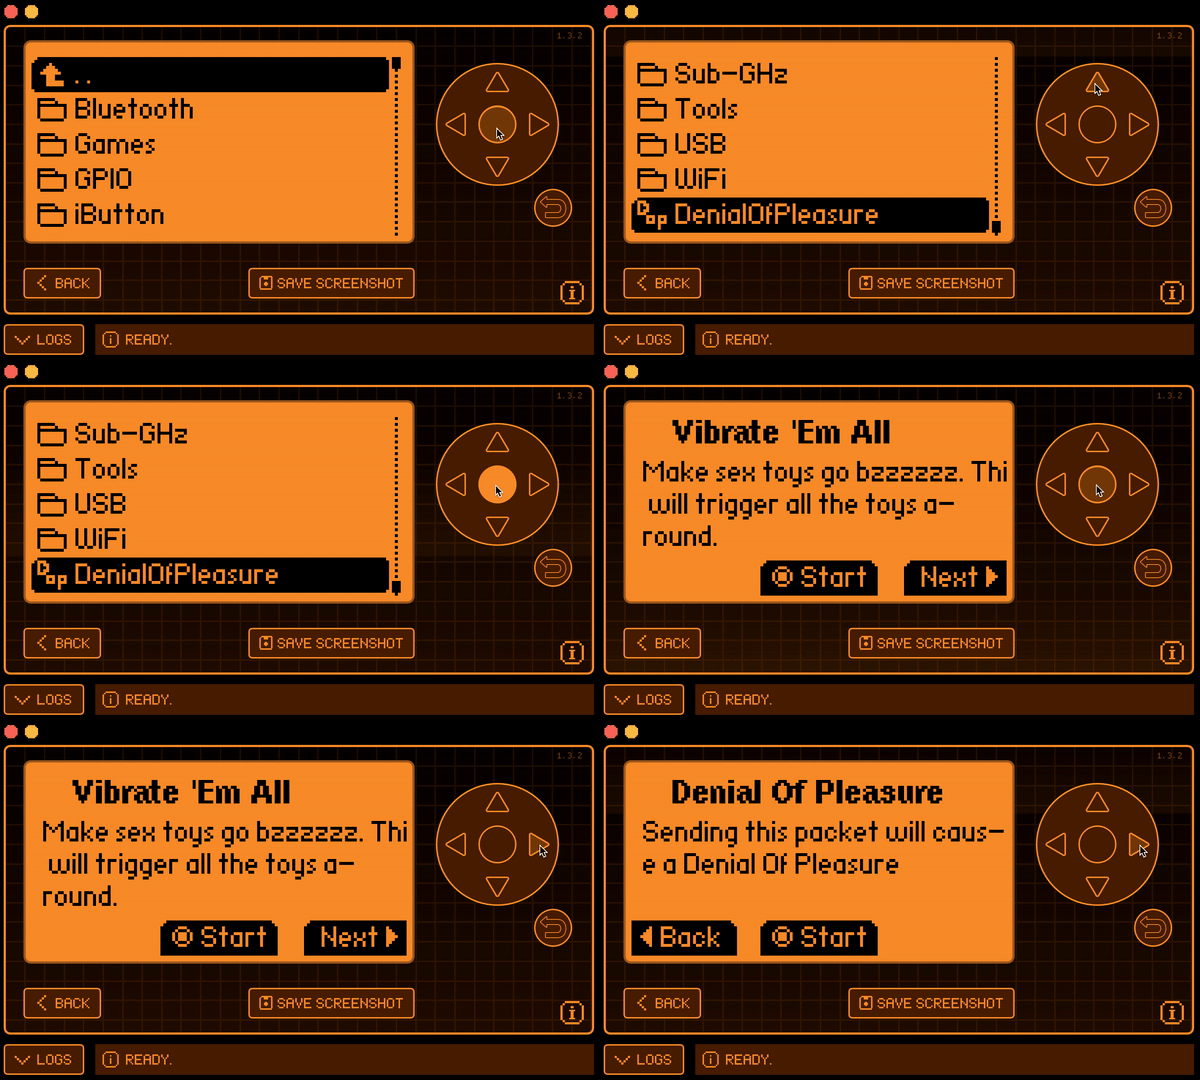
Final result
After following all the steps, this is the splendid result achieved. Enjoy the video. (The text in the app is different because it's an old build.)
Bonus Chapter: Hardware analysis
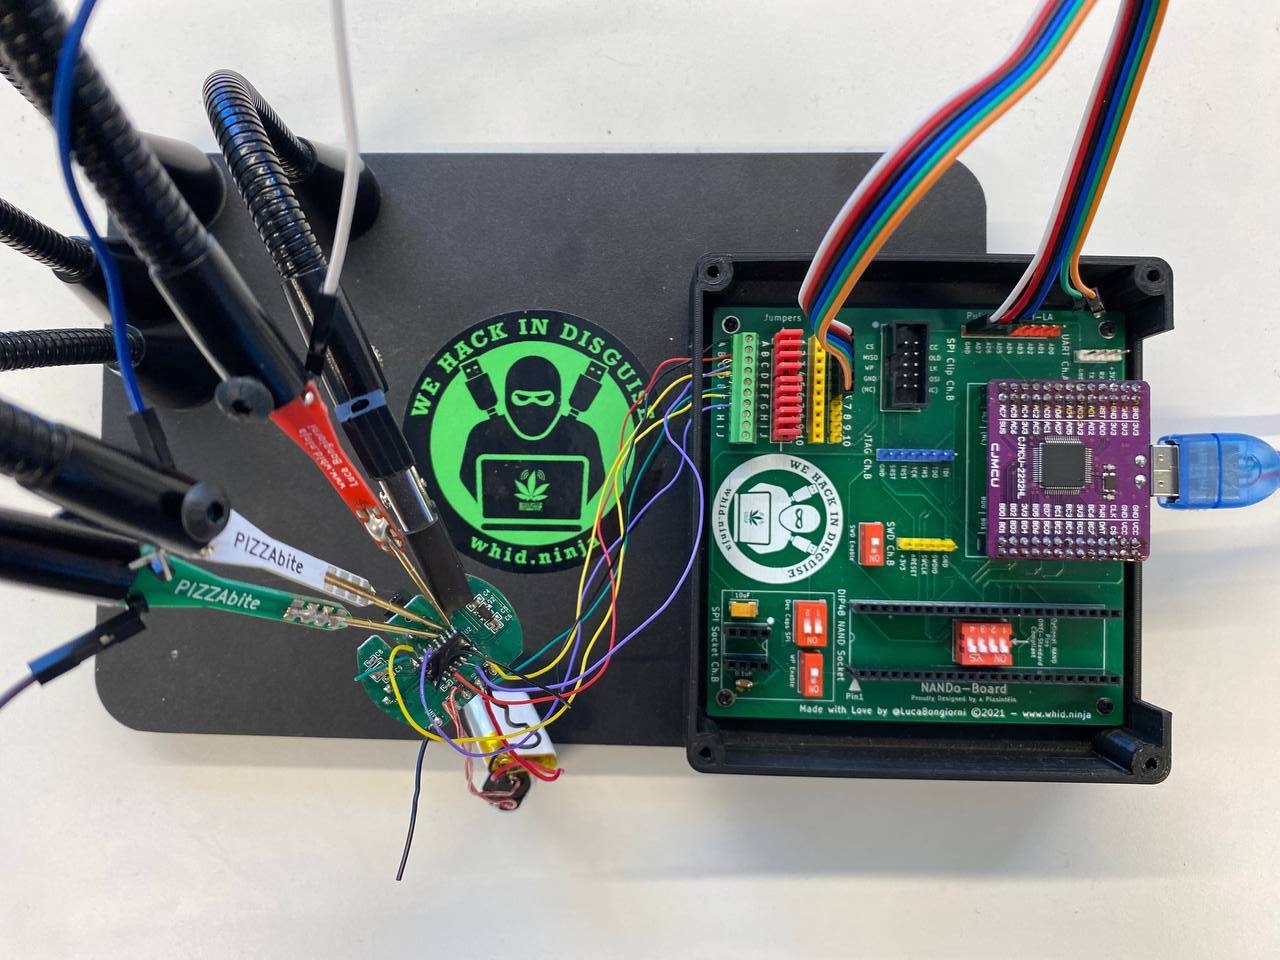
Now that we've delved into the software aspect and the implementation of a Flipper Zero application using Bluetooth APIs, why not also explore the hardware component of our targets? For this purpose, I utilized Luca's tools (https://www.whid.ninja/) and asked for his assistance during the execution. Specifically, the tools used include:
- Nando Board - for its
logic analyzer feature
- Pizza Bites - to avoid soldering too many pins
- Pulse View - to plot the result of the logic analyzer
Here's a picture of the final setup:
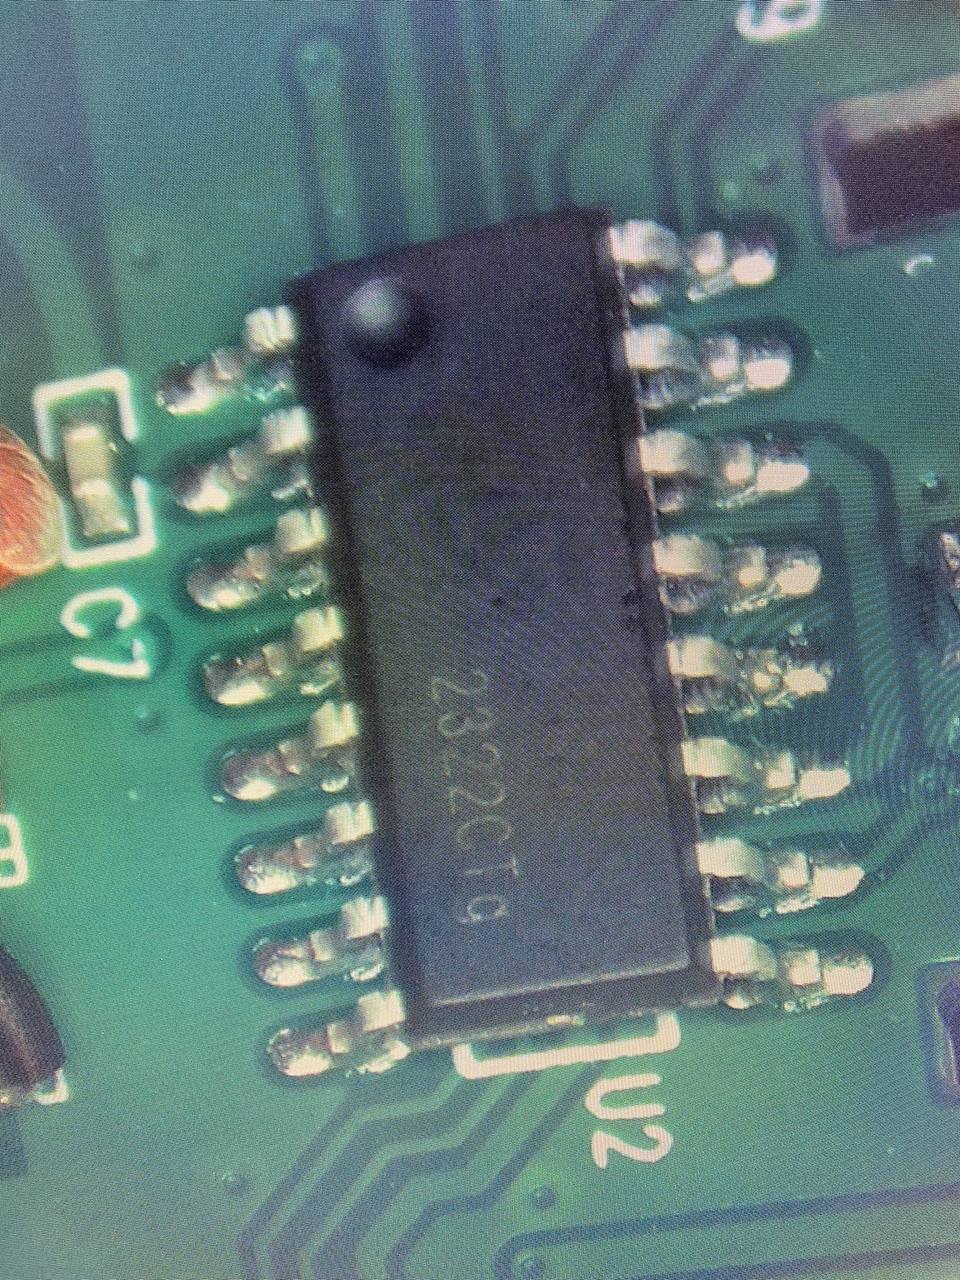
The chip bears the inscription "2322CTg," but we couldn't find anything about it online. So, we decided to check out the voltages and connections while the device was off, on, and vibrating. Quick heads up: the battery still gives off some voltage even when the device is off, so we had to unsolder it for accurate measurements. In the figure below, I've documented the collected data, with the one pin that danced around during vibration highlighted in green.
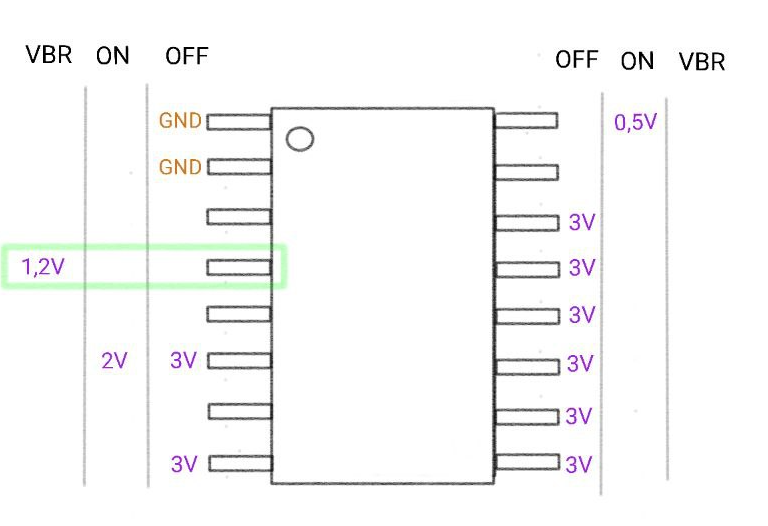
After arranging all the connections, we used Nando's board logic analyzer to understand what happens when different broadcast packets are sent. In the image below, ADBUS7 corresponds to the pin at 1.2V, which seemed the most likely to be involved in activating the motor upon the arrival of the broadcast packet. Indeed, by using different modes of the application, we observed this channel (ADBUS7) began emitting signals precisely at the moment of the click. In the images below, we can see the different signal patterns corresponding to modes 1 and 4 and 7 of the mobile app.
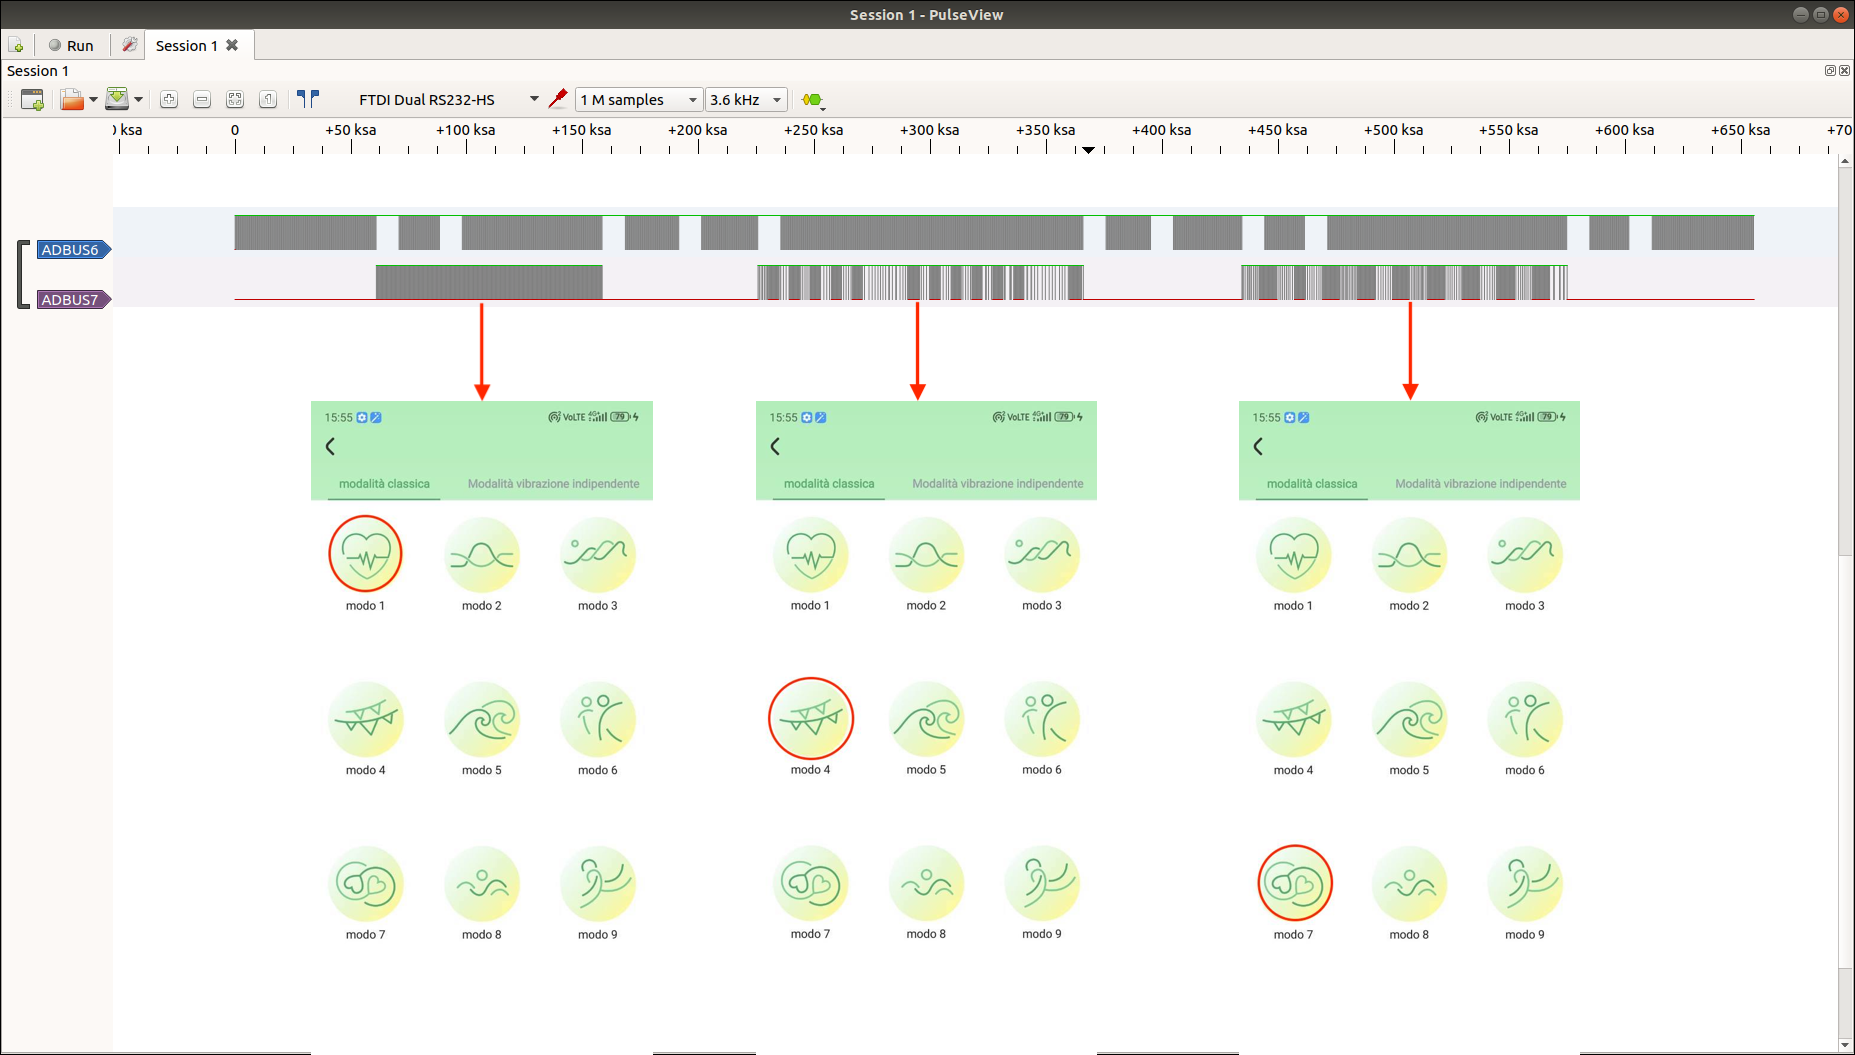
From this initial analysis, aside from making some educated guesses about the purpose of certain pins, there's not much else we can say at the moment. We reserve the option to delve deeper into the analysis of this chip in the future, especially if we come across it in other targets.
Conclusions
- We've figured out how BLE broadcasting works.
- We've checked out the Flipper Zero's BLE API.
- We've had fun making things vibrate and tearing them apart to get a better grip on how they work.
What more can
you ask for in life? Stay tuned for future projects! :)
WANNA BECOME A CERTIFIED HARDWARE HACKER?
The Offensive Hardware Hacking Training is a Self-Paced training including Videos, a printed Workbook and a cool Hardware Hacking Kit. And... you get everything shipped home Worldwide! For more info... ➡ https://www.whid.ninja/store